Permissions Required: Manager
How To Video
How To Enable eForms
Step 1
Click on Document Library From within the Projectfusion Dashboard

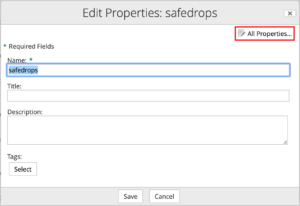
Step 2
Click On Edit Properties on your safedrop folder

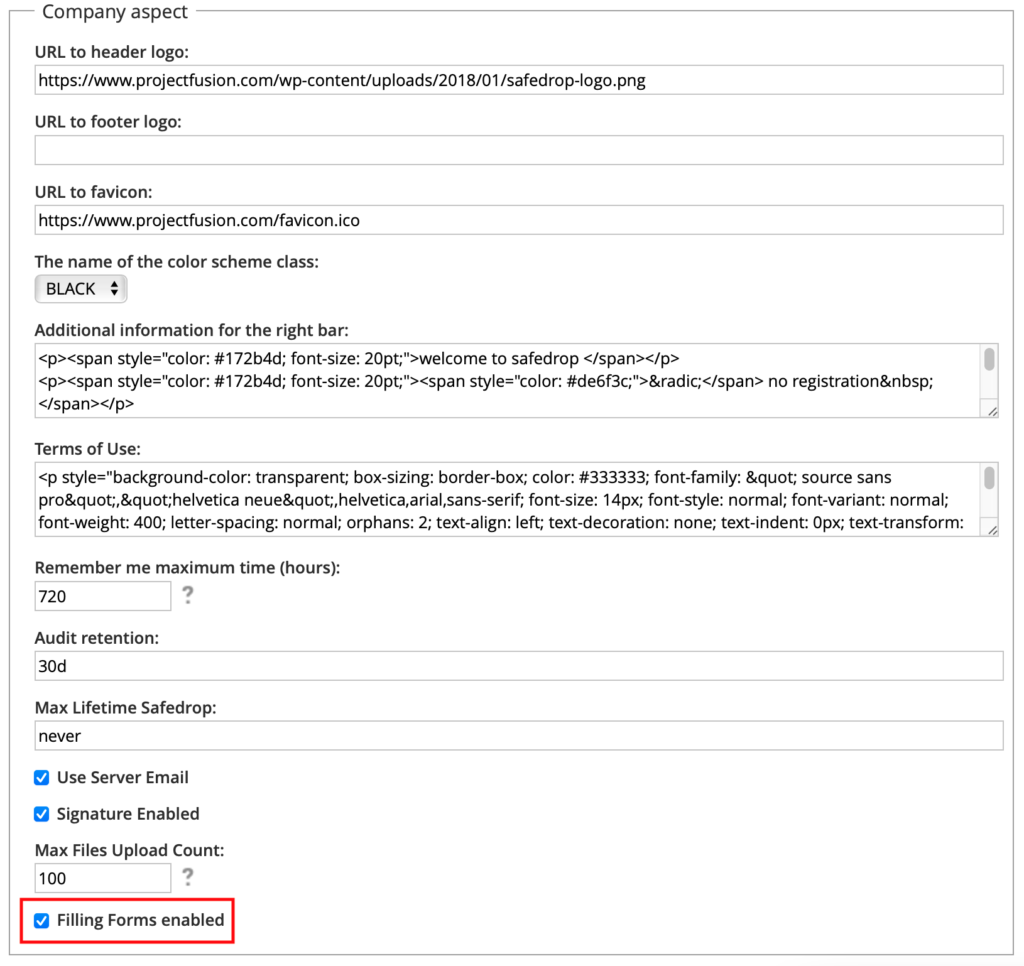
Step 3
Click on all properties
Step 4
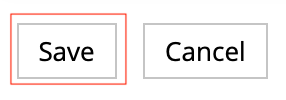
Ensure filling forms is enabled and hit the save button at the bottom.
Wrap Up
Once this is done Form Filling will be enabled on your safedrop service and you can progress as normal with sending a form.
How To Send and Edit an eForm
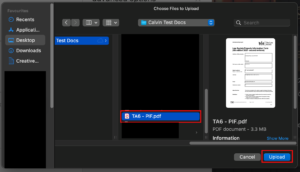
Step 1
Attach your form to the safedrop as per usual. you can do this by pressing add your files or drag and drop.
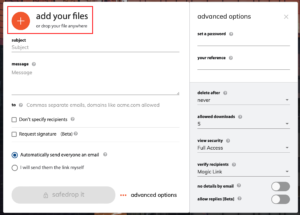
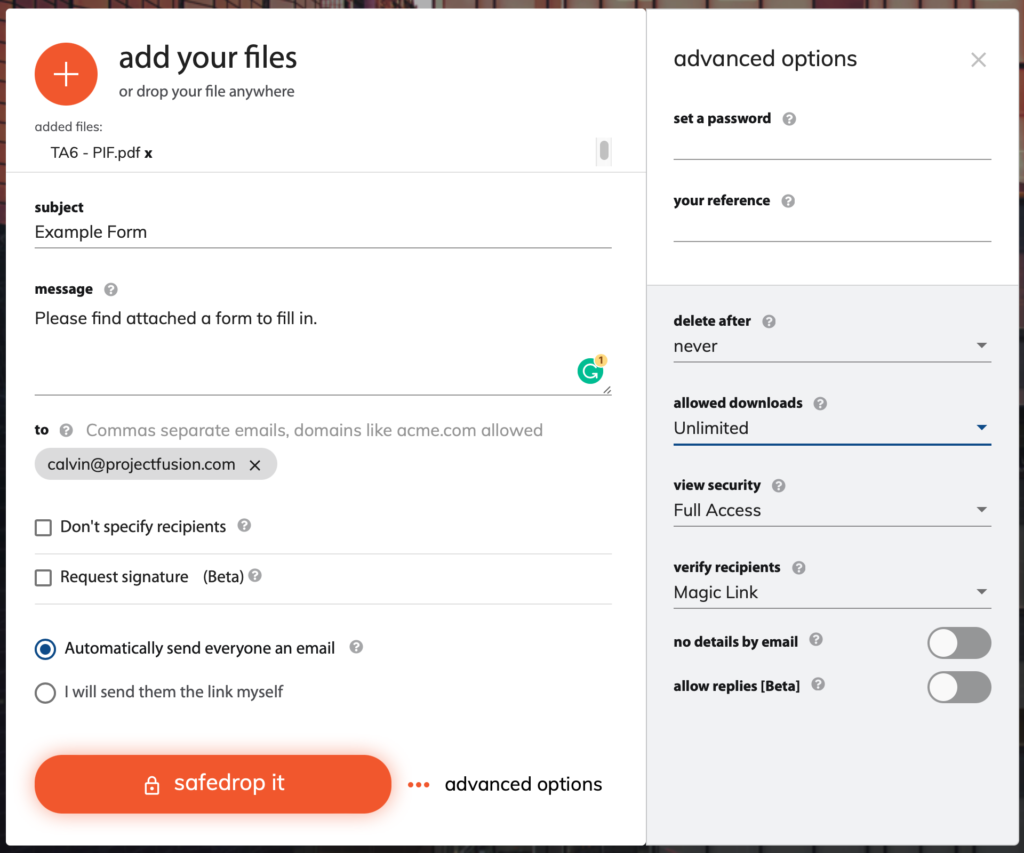
Step 2
Adjust your options as required the default is usually okay unless you require something specific. if you would like a completed copy in your inbox once the form is filled in just make sure no details by email is disabled this is the default however if this is enabled you will have to download as specified in step 6.
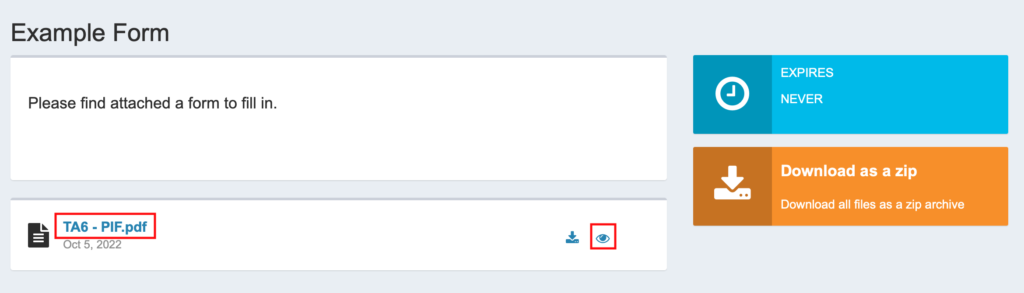
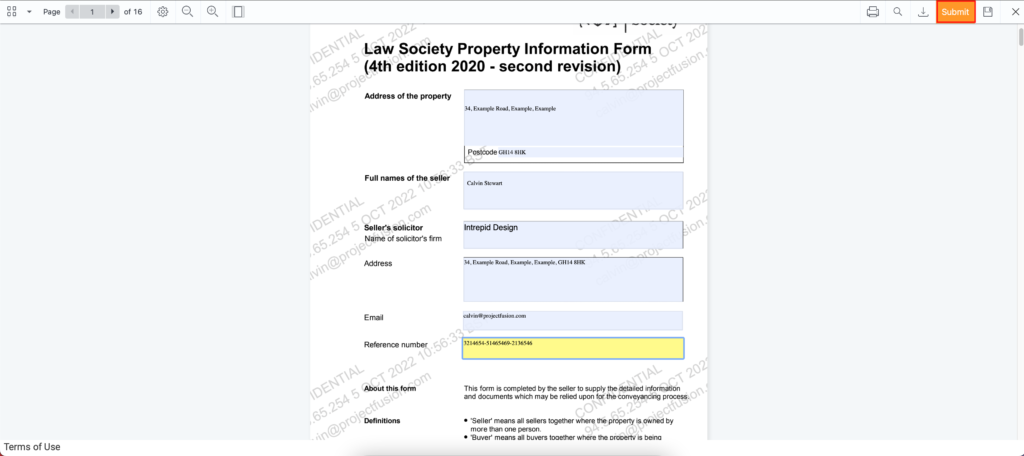
Step 3
Click either the blue text or the eye logo to view and edit your eForm you can do this as the sender or the recipient depending on your needs at the time.
Step 4
Click on the blue boxes to edit your eForm there are many types of editable details including Text, Date and Signature are just a few examples. you can save your progress at any point and come back to it later if needed by pressing the save button in the top right-hand corner.
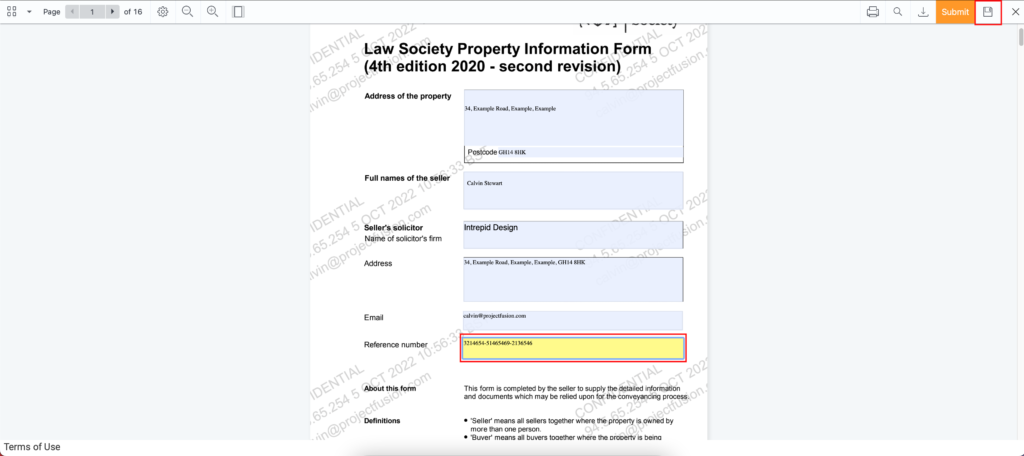
Step 5
Once you are satisfied everything is completed and ready to be downloaded or sent on for another process just press submit and all changes will be locked and finalised.
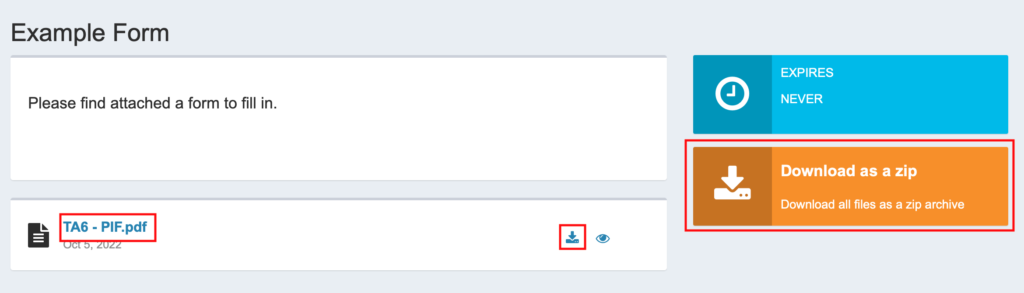
Step 6
Once you have submitted your changes you can then download this completed eForm by clicking the blue text, the download logo, or donweload as zip by pressing the indicated buttons in the picture below.
We hope this guide helps and if you require any further assistance please just email us at support@projectfusion.com