Permissions Required: Manager
How to enable Templates
Step 1
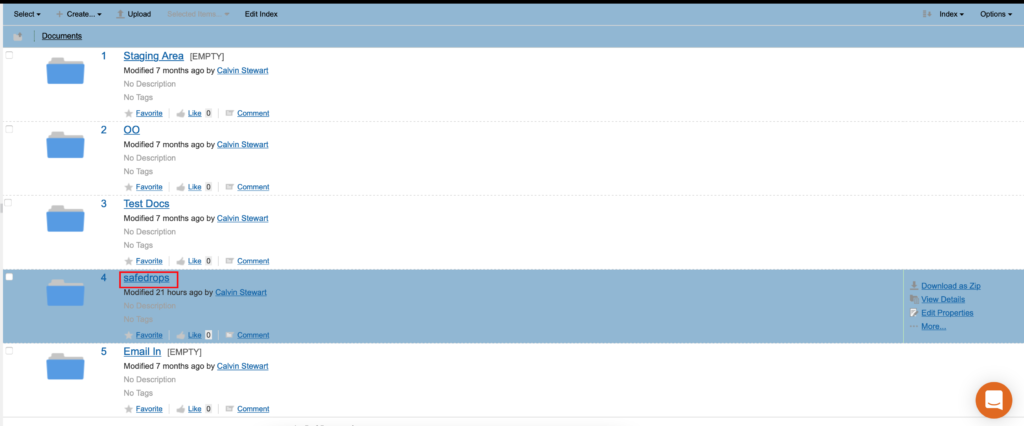
Go to the document library and find your safedrop folder, and click to open it.
Note: If you can’t see a safedrop folder, then the top-level document library will be your safedrop folder. If this is the case, skip to step 2.
![]()
Step 2
Create a new subfolder called “templates” and then press save.
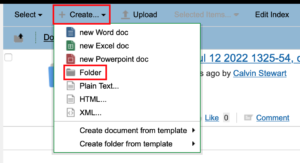

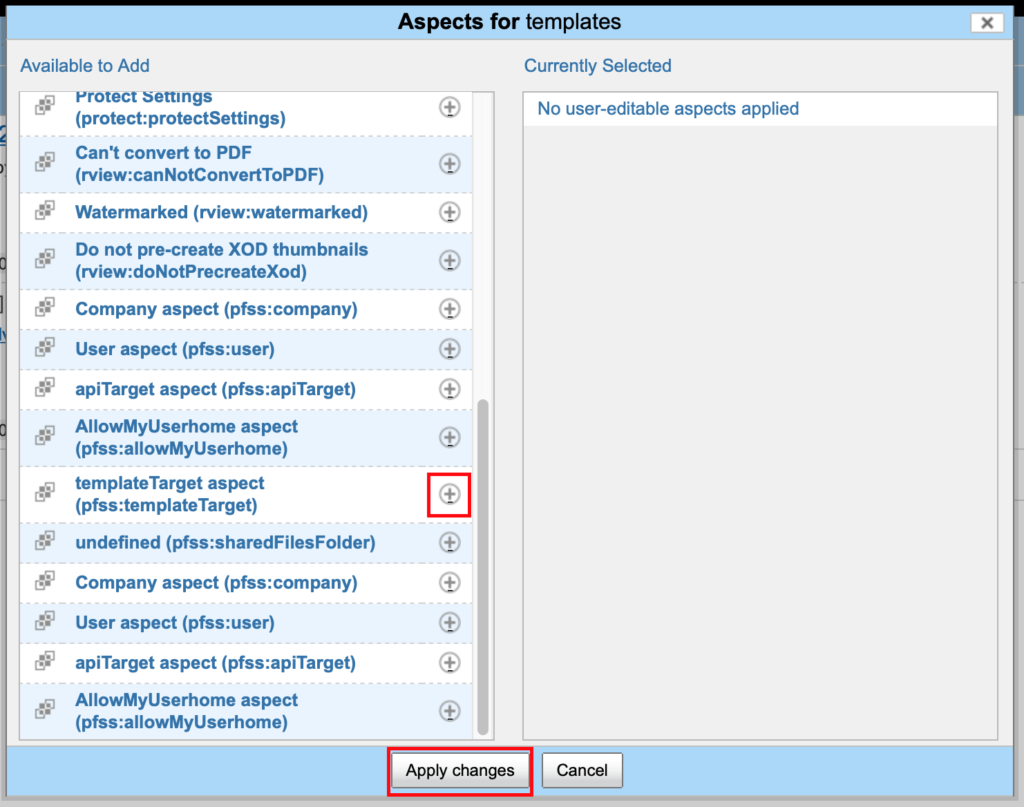
Step 3
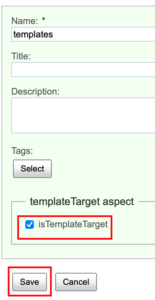
Hover over the new “templates” folder and click more… followed by manage aspects. In the following screen, find the templateTarget aspect and click the + symbol to assign the aspect to the templates folder, then click apply changes.

Step 4
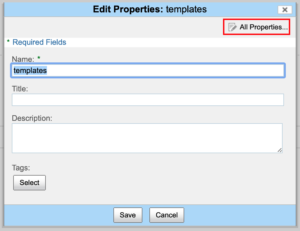
With the aspect applied we now need to enable it. Go back to the safedrop folder, hover over your new templates folder and click edit properties, then click all properties in the top right-hand corner. On the next screen, scroll down and make sure the checkbox next to isTemplateTarget is enabled and then click save. This will enable the changes and you are now ready to make your templates.

Making Your Templates
Step 1
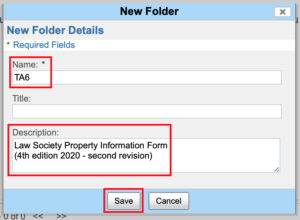
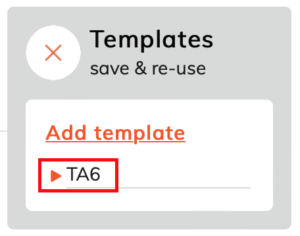
For this example, we will be making a template for the TA6-PIF form. Navigate to your templates folder (see above for details if you haven’t already created the folder yet). Your templates will be stored here in separate subfolders, so create a new folder and make sure to give it a Name and a Description. These details will auto-fill your Subject and Message in the safedrop. In the example below, we’ve set the name as TA6, so the Subject line of the safedrop will be “TA6”.

Step 2
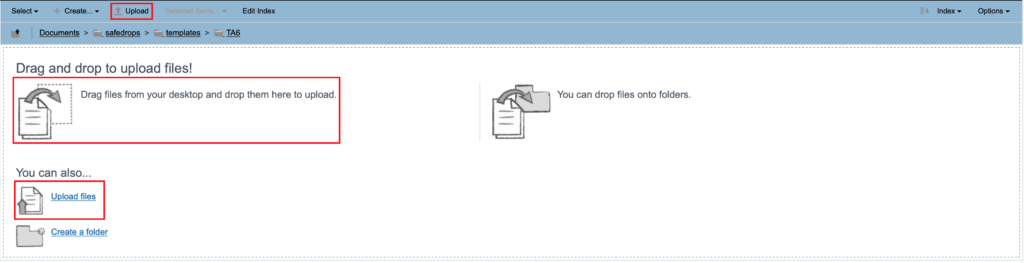
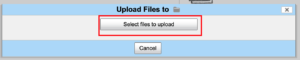
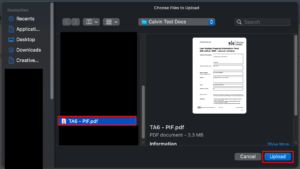
Upload your prepared eForm (either as a .doc or .pdf file) to the new folder you have just created, by Drag and Drop or “Click to Upload” as shown below. Once uploaded, you can head back to safedrop and your template will be ready to use.
Using and sending your template via safedrop
Step 1
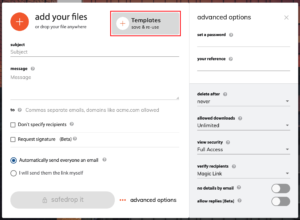
Once logged into safedrop, click the templates button and select the folder from the drop-down list. Once you have done this, the file will be added to the safedrop and the subject and message body will be auto-filled from the Title and Descriptions we set in the steps above. From here all you need to do now is add the recipient address(es) and set any advanced options you wish, before hitting safedrop it!

We hope you enjoy this new feature as much as we do and as always if you need any further support please drop us a message at support@projectfusion.com