Menu
  • About Us
  • Pricing
  • Features
SCHEDULE DEMO
Popular Search goodsyncdownload

Advanced Options

  • How To Live Edit A Spreadsheet
  • How To Live Edit A PowerPoint Document
  • Real-Time Collaboration Guide
  • How To Live Edit A Document
  • Using The Projectfusion IOS App
  • Getting Your Data Room Ready For The IOS App
  • Allowing Download Access To Files
  • Projectfusion Closing Bibles
  • Backup And Redundancy Options
  • Archiving Sites The Right Way
  • Getting A Closing Bible Or Archive Of Content
  • Making Changes To Your Billing Account Such As Changing Payment Details, Billing Address, Changing Your VAT Number, Changing Your Billing Account Password Or Cancelling A Subscription
  • Adding Another Credit Card Or Direct Debit Subscription To Your Plan
  • Setting Folder And File Permissions
  • How To Setup And Use Email Upload
  • How To Upload Files Discretely
  • Uploading Or Downloading Files With Windows Web Folders / WebDAV
  • Setting Up Expandrive/Projectfusion Desktop App
  • Uploading & Downloading Files And Folders Using A Zip File
  • How To Access And View Site Reports Using The Reporting Tool
  • Projectfusion Guide To Workflows And Tasks
  • How Do I Create And Use Workflows
  • Site Index Setup And Use
  • Data Lists
  • Bulk Add Users
  • Accepting Invites And Resetting Passwords – Managers & Admins
  • Naming Conventions And Allowed Characters
  • How To Enable Advanced Excel Viewer In Your Site
  • How To Stop All Users Downloading Files
  • How To Add An Image To The Site Dashboard
  • How To Disable Sites (Managers Only)
  • Site Creators Guide
  • How To – Deleting A Site
  • Adding Custom Watermarks To Documents
  • Setting Up Watermarks
  • Setting Up Terms And Conditions
  • Create A Site And Choose Visibility / Social Settings
  • How To Add Users Into A Site Using The Groups Interface (Admin Only)
  • How To Add Yourself Into A Site & Become A Site Manager
  • Trusted Users – For Admins Only
  • Accessing Custom Reports
  • The Audit Dashlet (Administrators)
  • How Do I Customise My Data Room Emails
  • Setting Up A Custom URL With Projectfusion
  • IE6 SSL Protocols / “POODLE” Vulnerability
  • Setting Minimum Password Strength
  • Restricting Projectfusion’s Access To Your Data Room
  • Creating And Adding Users To SITE_CREATORS Groups
  • The “ADMINISTRATORS” Group And How To Add Users To It.
  • CMIS & WebDAV Control Panel
  • Disable Customize User Dashboard
  • Document Comparison
  • How To Send A File Or Folder From Your Document Library Using Safedrop
  • How To Disable Activity Feed On A Per Site Basis
  • How To Disable Recent Activity Emails
  • Getting Changes Made To Projectfusion
  • Open Standards Support
  • Using Mobile Devices With Projectfusion
  • Excel Documents In Previewer
  • How To – Use Tags
  • How To – Upload & Download
  • How to add a video to your site dashboard
  • How to use image previewer
  • How to use Blogs
  • How To – Upload Using iOS App

Safedrop

  • Safedrop Outlook Plugin Guide
  • How To – Use Safedrop Inbox
  • Using Inbox To Receive Files
  • Upload Files That Won’t Expire So You Can Safedrop Them Over And Over Again. ‘Advanced’ Interface Guide
  • Safedrop Admin
  • Safedrop Service Guide
  • Free User Safedrop Service Guide
  • How To Use The Zylpha Safedrop App
  • How To Edit Terms Of Use, Audit Retention And ‘Remember Me’ Times And Change Your API Target Folder (Advanced)
  • How To Receive Your Safedrop
  • How To Access Safedrop From Projectfusion
  • How To – Send a Safedrop
  • How To – Track a Safedrop
  • How to – Use ESIG

Getting Started

  • Getting Started With The iOS App
  • How To – Access And Manage Q&A
  • How To – Add Users
  • Getting Started Video
  • Service Guide For Managers & Admins
  • Quick Start Manual
  • How to – Use ESIG

FAQ

  • Live-Edit Keyboard Shortcuts
  • Our Policy For Upgrading/Downgrading Plans
  • Per Site Billing Option
  • What Are – Roles And Permissions
  • What Is – Autonumbering And Indexing
  • How To – Send an email to entire data room
  • Re-Inviting Members Who Have Left A Site
  • Supported Document Types For Secureview And Preview
  • How To Customise Your Site Dashboard
  • Sites I Manage
  • How To – Search
  • The Site Activity Dashlet
  • 2FA Guide
  • Deleting & Restoring Things From The Recycle Bin
  • Changing The Logo And Theme For All Sites
  • How To – Select / Change Your Home Page
  • Supported Languages
  • How To – Login To The Data Room
  • How To – Delete Files
  • How To – Branding
  • Can I transfer folders between two sites
  • Issues accessing safedrop on Chromium Browsers
  • Q&A Notifications & FAQs
  • Home
  • help
  • Advanced Options
  • How to use Blogs

How to use Blogs

Permissions Required: Manager


Intro

You can use a blog for announcements. Your blog post will be available in the site activities dashlet and sent out to all members who receive the site activities email. This is a great way of letting everyone in the dataroom know the changes you’ve made to the site, this will be a publicly available announcement in which every member of the site can see no matter their privileges.

How to Video


Step 1

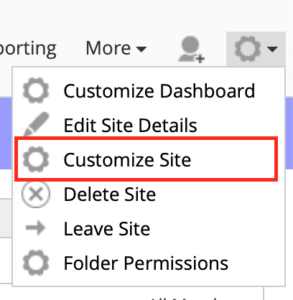
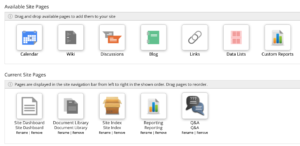
From the dashboard press the cog in the right hand side of the screen and select customise site from the drop down list.

Step 2

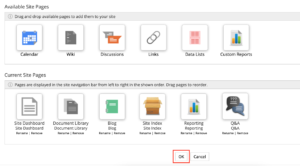
Drag and drop the Blog page from the available site pages box to to current site pages box and press ok.

Step 3 (optional)

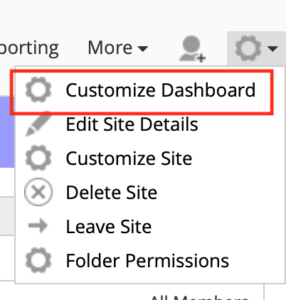
Add the blog dashlet to the dashboard. From the dashboard press the cog in the right hand side of the screen and select customise dashboard from the drop down list.

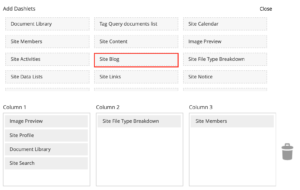
Press the add dashlet button

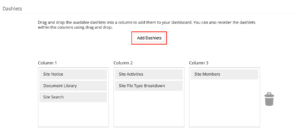
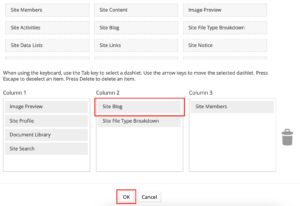
add the site blog to one of the columns then press ok

Step 4

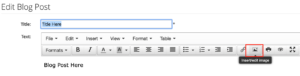
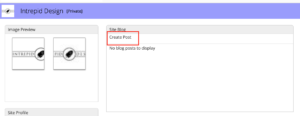
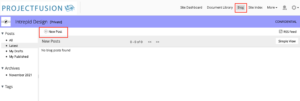
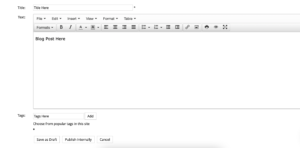
Using either the blog page or the blog dashlet press new post or create post depending on if you are using the page or the dashlet.

Then create your blog with a title out the title and the main body within the text box. You can also add tags at the bottom. Once you are happy with the blog, you can then either save it as a draft and publish the blog at a later time, or you can press publish internally to immediately publish the blog.

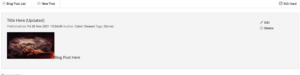
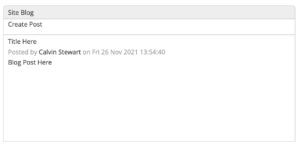
It will now be available to everyone on your site.

Advanced Option

Adding an image to the blog:

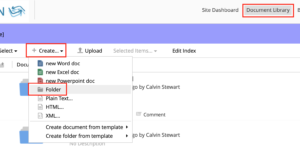
a) – Create a folder in your Document Library called blog images and leave this default with no restrictions.

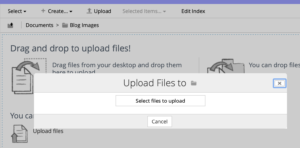
b) – Upload any images you want for blogs into this folder you can also use sub folders if you wish.

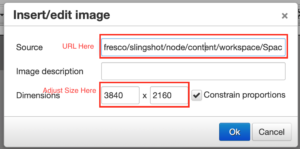
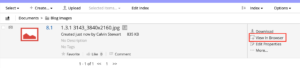
c) – once uploaded, the image will have a url attached to it. You can find it by clicking ‘view in browser’, then you can right click and copy link from your browsers address bar.

d) Navigate into your blog and press insert image it will ask you for a source this is the url you have copied, paste it here. If you wish to you can adjust the size of the image at this point by adjusting dimensions. Press ‘OK’ when you’re done.

What are your Feelings
Share This Article :
  • Facebook
  • Twitter
  • LinkedIn
  • Pinterest
Updated on February 16, 2022
How to use image previewerHow To – Upload Using iOS App
Solutions
  • Data Room
  • Collaborate Portal
  • Digital Courtroom
Resources
  • Videos
  • Downloads
  • Apps
  • Customers
Company
  • Blog
  • Contact
  • Ethics
  • (+44)20 7183 1245
We’re ISO27001 accredited…
We’re also fully GDPR compliant…
We’re also Cyber Essentials certified too!
We give 1% of turnover to charity!
Leave us a review!
  • 2021 OD Consultancy Ltd. All rights reserved
  • Terms
  • Privacy
  • sales@projectfusion.com
  • Projectfusion.com
Twitter
Facebook-square
Linkedin